
Introduction
Building a retro PC to run Windows 98 and its classic games is a nostalgic journey for gaming enthusiasts and PC builders alike. Whether you want to relive the golden age of gaming or experience classic titles for the first time, building a retro PC from scratch allows you to create a system that runs Windows 98 seamlessly. In this guide, we’ll walk you through the essential components, how to set up Windows 98, and tips for optimizing your retro gaming experience.
Why Build a Retro PC for Windows 98 Games?
The Allure of Windows 98 Gaming:
Windows 98 was home to some of the most iconic games, from Half-Life to StarCraft and Age of Empires II. By building a retro PC, you can create the perfect setup for these titles, preserving the old-school experience with modern reliability.
- Authentic Experience: Play games the way they were meant to be experienced.
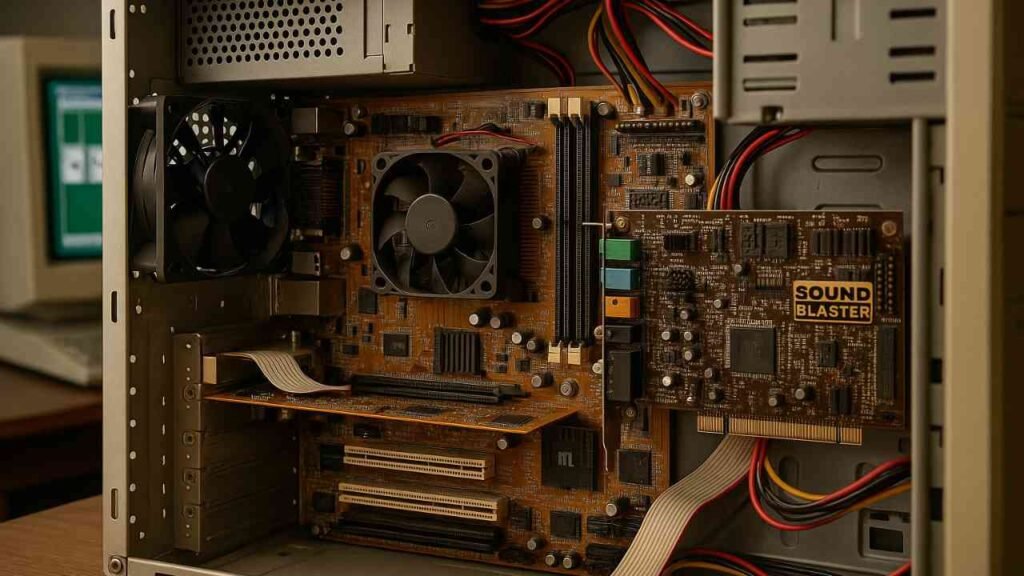
- Game Compatibility: Some old games run best on Windows 98 or older hardware, especially with legacy drivers and sound cards like Sound Blaster.
- Customization: You can hand-pick components based on your desired performance and budget.
Essential Components for Your Windows 98 Retro PC
When building a retro PC for Windows 98, certain components are crucial to ensure optimal performance and compatibility with older software.
A. Processor (CPU)
- Intel Pentium III or AMD Athlon: These processors were common in the Windows 98 era and are perfect for running most games of the time.
- Why It’s Important: These CPUs strike a balance between processing power and compatibility with older software.
B. Motherboard
- Socket 370 (Intel) or Socket A (AMD): These are compatible with older CPUs and provide enough I/O ports for legacy connections.
- Why It’s Important: A motherboard with a compatible chipset (Intel i440BX or VIA KT133) will help ensure Windows 98 runs smoothly.
C. Memory (RAM)
- 256MB to 512MB of SDRAM: Older games don’t require large amounts of RAM, and these amounts are perfect for Windows 98.
- Why It’s Important: It’s important to stay within the specifications of older operating systems to avoid performance issues.
D. Graphics Card (GPU)
- NVIDIA TNT2 or Voodoo 3: These GPUs were popular during the Windows 98 era and supported the visual demands of most games.
- Why It’s Important: These cards offer DirectX 7 and OpenGL support, ensuring a smooth gaming experience.
E. Storage (Hard Drive)
- IDE PATA Hard Drive (20GB to 40GB): Windows 98 supports PATA (Parallel ATA) drives and doesn’t require large modern SSDs.
- Why It’s Important: Ensure the drive has enough space for your OS and classic games, but avoid modern SATA drives as they might not be compatible.
F. Sound Card
- Creative Labs Sound Blaster 16 or Sound Blaster Live!: These legacy sound cards are critical for authentic audio and game compatibility.
- Why It’s Important: Many classic games are designed with Sound Blaster drivers in mind, and using one will ensure the best sound experience.
Setting Up Windows 98 on Your Retro PC
Once your hardware is assembled, it’s time to install Windows 98.
A. Creating a Bootable Windows 98 Disk
- Bootable CD: Windows 98 was commonly installed from a CD, so you’ll need a bootable disk to load the installation files.
- Creating a Boot Disk: Use a Windows 98 bootable CD or a USB drive (with DOSBox or a similar tool) to boot into DOS and begin installation.
B. Installing Windows 98
- Insert the Bootable Disk/USB and restart the computer.
- Run the Setup program from the disk to start the installation process.
- Follow the on-screen prompts to select your partition, region, and other preferences.
C. Installing Drivers
- Once Windows 98 is installed, make sure to install legacy drivers for sound cards, video cards, and network cards. Many websites still host Windows 98 drivers or driver archives.
- Download and install essential updates for DirectX 7 or DirectX 8, as most old games were designed to run with these versions of DirectX.
Optimizing Your Retro PC for Windows 98 Gaming
Performance Tweaks:
To make sure your retro PC runs smoothly, here are some tips for optimization:
- Disable Unnecessary Background Processes: Windows 98 can be sluggish if too many processes are running in the background, so disable non-essential services.
- Adjust Virtual Memory Settings: Set the paging file size manually to avoid issues with memory allocation.
- Use Compatibility Mode: If you run into problems with certain games, try compatibility mode (Windows 95/98) to avoid crashes or errors.
Installing and Playing Retro Games
Once your Windows 98 retro PC is up and running, it’s time to start installing your classic games.
- Install via CD or ISO: Many older games were distributed on CD-ROMs, but if you have ISO backups, use a virtual CD drive to mount and play them.
- Use DOSBox for DOS Games: Some games may require running on a DOS emulator. You can install DOSBox to run DOS-era games on your modern system.
Common Issues and Troubleshooting
Fixing Compatibility Issues:
- Game Crashes: Use compatibility mode or adjust system memory settings to ensure games run smoothly.
- Sound Issues: If there’s no sound, check if your Sound Blaster drivers are correctly installed and configure them through the Control Panel.
- Display Problems: For graphical glitches, ensure your video drivers match your GPU and adjust screen resolution to fit your monitor.
Conclusion
Building a retro PC to run Windows 98 games allows you to relive classic gaming in its purest form. With the right components, you can build a system that faithfully reproduces the experience of playing those iconic games. Whether you’re a gamer, a collector, or a nostalgia-driven enthusiast, a Windows 98 retro PC is a great project that offers hours of fun and a deeper connection to the golden era of PC gaming.